DIY Foreign Coin Magnets

DIY Foreign Coin Magnets

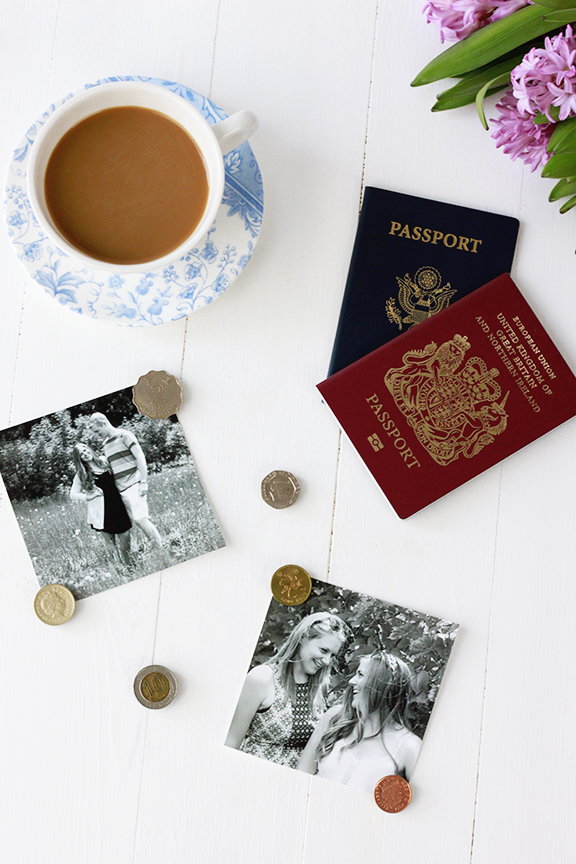
Throughout our travels Ian and I have collected spare change in various currencies. Recently, they were tucked away in box beneath our bed. Every so often we would pull out the box, dust it off, and reminisce about our vacations. As we shifted through the coins we would talk about the beautiful views, delicious food and wonderful memories we made in each country. It seemed sad to store them away, so I brainstormed ways to incorporate them into our daily life. Then it hit me – they would make perfect magnets!

DIY Foreign Coin Magnets

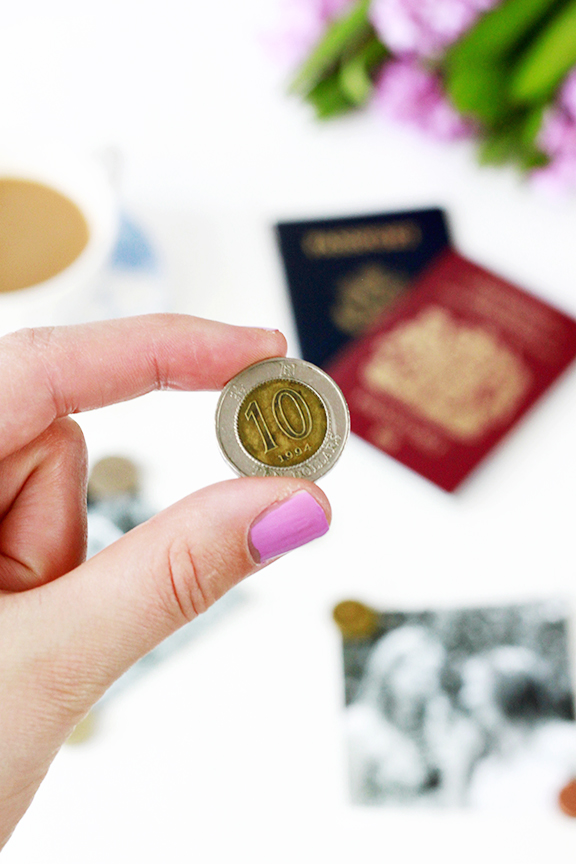
I was shocked it took me so long to come up with this solution! In a matter of minutes I glued magnets to the back of our coin collection and placed them on the fridge. Now, instead of gathering dust beneath our bed they are holding up pictures from our adventures. Every once in awhile I catch myself in the kitchen staring at the fridge and I’m grateful to have a daily reminder of all the places we’ve been and dream about where we want to go next.

DIY Foreign Coin Magnets

DIY Foreign Coin Magnets

Supplies:

  • Coins
  • 3/8″ magnets
  • Super glue

Directions:

  • Place a small dot of superglue to the back of a magnet
  • Press the magnet onto the backside of a coin
  • Set aside and wait for the glue to dry before placing on the fridge

Clay Recipe Card Stand

DIY Clay Recipe Card Stand

Call me old-fashioned, but I still prefer handwritten recipe cards over apps. Someday I may migrate over to the paperless version, but for now I love flipping through my recipe box and seeing my handwriting mixed in with the handwriting of my mother and grandmother. It reminds me of the generations before me who loved the art of cooking and have passed down their knowledge.

DIY Clay Recipe Card Stand

In an effort to improve the ease of using my recipe cards I made a set of clay card stands that prop up my recipes. Now you don’t have to worry about having sauce or batter on your hands and smudging your recipe card. These card stands will prop your recipe up on the countertop for easy viewing and make you think twice before downloading a recipe app! (I’m fighting a losing battle, aren’t I? Oh, well!)

DIY Clay Recipe Card Stand

If you still enjoy using paper recipe cards, make a set of these card stands for your kitchen! They would also be a beautiful gift to give alongside a pack of recipe cards as a housewarming present!

Clay Recipe Card Stand

Materials:

  • Oven Bake Clay
  • Acrylic Paint
  • Paint Brushes

Directions

  • Preheat oven to 275 degrees
  • Mold two small squares out of clay. Use a butterknife to cut a slit halfway down into one side of the square.
  • Place clay card holders into the oven to bake for 20 minutes. Remove from the oven and set aside to cool.
  • Paint as desired. Let dry before use.

Essential Oil Shower Steamers

DIY Essential Oil Shower Steamers

It’s no secret I’m a lover of bubble baths. I used to get giddy around the holidays just to see what new bath bombs Lush brought out and loved trying new products. Therefore, you can understand the convincing Ian had to do in order for me to move into an apartment – without a bathtub!  I went through a period of mourning, but have since adapted my “pamper night routine” to be shower-friendly.

DIY Essential Oil Shower Steamers

While I no longer can soak beneath the multicolored foam of a Lush bath bomb, I can still enjoy uplifting scents while I shower. Sadly, these shower steamers don’t come covered in glitter or release flower petals, but they get the job done. When placed in your shower they gently fizz and dissolve as they release the scent of essential oils. They are the perfect addition to your daily routine, pamper night, or with the right oils – a natural remedy for a stuffy nose.

DIY Essential Oil Shower Steamers

Essential Oil Shower Steamers

Ingredients:

  • 2 C. baking soda
  • 1 C. citric acid
  • 1 C. cornstarch
  • 2-3 Tbs. water
  • Essential oils of your choice

Directions:

  • Line muffin tins with paper casings
  • Mix together the baking soda, citric acid and cornstarch. Add one tablespoon of water at a time until the mixture reaches a snowball consistency.
  • Spoon the mixture into the muffin tins and set aside over night.
  • Store the shower steamers in an airtight container.
  • Add 1-2 drops of essential oil on the shower steamer before use. Place away from the direct stream of water and enjoy!